shono-hime.livejournal.com (![[identity profile]](https://www.dreamwidth.org/img/silk/identity/openid.png) shono-hime.livejournal.com) wrote in
shono-hime.livejournal.com) wrote in ![[community profile]](https://www.dreamwidth.org/img/silk/identity/community.png) subtletea_icons2006-11-24 09:55 pm
subtletea_icons2006-11-24 09:55 pm
Tutorial n°4 - Stock
First tutorial in English, I hope it's not too confusing, since English is not my mother tongue :) Let me know if there's anything unclear, yeah? ^^
It was requested by![[livejournal.com profile]](https://www.dreamwidth.org/img/external/lj-userinfo.gif) petite_patate ♥
petite_patate ♥
If you want me to write another tut on one of my icons, you can go there and ask!
Let's find out how to go from this to using
using


Brightness: -7 / Contrast: +5

Saturation: +11


Saturation: +19

Midtones: -27; +19; +7
Shadows: +6; -6; -8

AUTUMN. I used Luciano in #D6D450, 10pt
For the pretty A in the background, I used HelenaScriptES still in #D6D450, 30pt, at 30% opacity.
Once again, don't be afraid of asking if you need any further explaination on something. I'll be more than happy to help you!
Also, show me what you got using this tut, I'm curious!
Of course, remember not to copy this tutorial from scratch. Experiment, that's the best way to learn!
It was requested by
If you want me to write another tut on one of my icons, you can go there and ask!
Let's find out how to go from this to
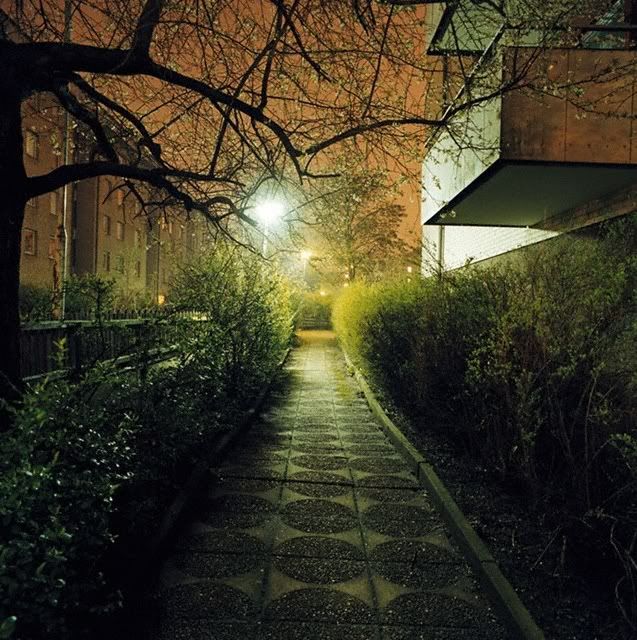 using
using Photoshop CS
!&01
Take your base (found at Veer) and crop it to your liking. I got this:&02
Duplicate your base layer and set it to Soft Light at 50%. Sharpen&03
Duplicate your base layer once again and this time, set it to Screen at 50%.&04
New adjustment layer: Brightness/Contrast. Use this settings:Brightness: -7 / Contrast: +5
&05
Another adjustment layer: Hue/Saturation this time. Settings:Saturation: +11
&06
New layer. Fill with #ECC6F4 and set to Color Burn at 16%&07
New layer. Fill with #000715 and set to Exclusion at 100%&08
Another layer, filled with #BF803F and set to Soft Light at 100%&09
Once again, an adjustment layer: Hue/Saturation again. Settings:Saturation: +19
&10
We're almost done. New adjustment layer: Color Balance. Settings:Midtones: -27; +19; +7
Shadows: +6; -6; -8
&11
Only text left :) AUTUMN. I used Luciano in #D6D450, 10pt
For the pretty A in the background, I used HelenaScriptES still in #D6D450, 30pt, at 30% opacity.
Once again, don't be afraid of asking if you need any further explaination on something. I'll be more than happy to help you!
Also, show me what you got using this tut, I'm curious!
Of course, remember not to copy this tutorial from scratch. Experiment, that's the best way to learn!
no subject
Faite en suivant tes explications (et bon, en déviant carrément vers la fin, je l'avoue) :
no subject
Très jolie icone *o* Les couleurs sont extra!
no subject
also, I love your lj layout :)
no subject
Yeah, Ewan is love ^o^
no subject
Certainly better than my French xP
I can say "Il pleut comme les vaches qui pissent!" xD
My French teacher is awesome
I can say more stuff than that, of course, but it's like "hello," "how are you," "what day is it," "it's sunny," etc.
Anyway
Beautiful effect
no subject
no subject
thanks for taking your time in posting this icon tut!